create bootable windows 10 pendrive
Creating a bootable USB drive for Windows 10 or 11 is straightforward. Here’s a step-by-step guide: How to create bootable windows 10 pendrive

Table of Contents
Prerequisites
- USB Drive: At least 8 GB of storage capacity.
- Windows ISO File: Download the Windows 10 or 11 ISO file from Microsoft’s official website.
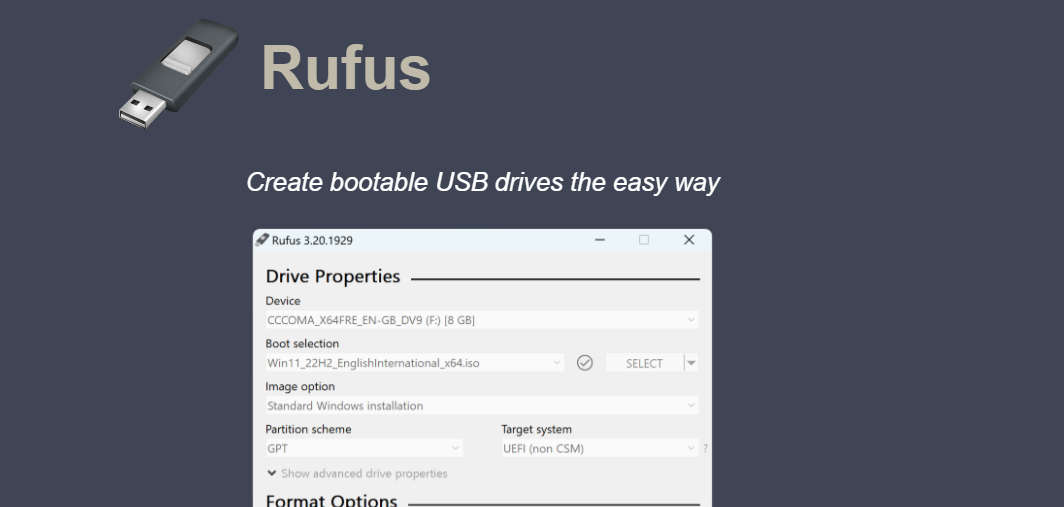
- Rufus Tool: A free utility to create bootable USB drives. Download it from Rufus Website.
Steps to Create a Bootable USB Drive
Option 1: Using Microsoft’s Media Creation Tool
- Download and Install Tool:
- Visit the Microsoft website and download the Media Creation Tool for Windows 10 or 11.
- Run the Tool:
- Launch the Media Creation Tool as Administrator.
- Choose Action:
- Select “Create installation media (USB flash drive, DVD, or ISO file) for another PC.”
- Select Preferences:
- Choose the language, edition (Windows 10 or 11), and architecture (64-bit/32-bit).
- Insert USB Drive:
- Connect the USB drive to your computer.
- Create Bootable Drive:
- Select the USB drive, and the tool will download Windows files and create the bootable drive.
- Completion:
- Once done, eject the USB drive safely.

Option 2: Using Rufus
- Download and Install Rufus:
- Install Rufus on your computer.
- Launch Rufus:
- Insert the USB drive into your computer and open Rufus.
- Select ISO File:
- Under “Boot Selection,” click on the “SELECT” button and browse to the Windows ISO file.
- Configure Settings:
- Partition Scheme: GPT (for UEFI systems) or MBR (for legacy BIOS).
- File System: NTFS (preferred).
- Start the Process:
- Click “START” to begin creating the bootable USB.
- Confirm if any warnings about data loss appear.
- Wait for Completion:
- Rufus will complete the process and notify you when done.
- Eject USB:
- Safely remove the USB drive.
Using the Bootable USB
- Insert USB:
- Plug the USB drive into the computer you want to install Windows on.
- Enter Boot Menu:
- Restart the computer and press the designated key (e.g., F2, F12, DEL, ESC) to access the boot menu.
- Select USB Drive:
- Choose the USB drive from the list to boot from it.
- Follow Installation Instructions:
- Proceed with the on-screen prompts to install Windows.
Here’s a detailed expansion on each method and troubleshooting tips for creating a bootable Windows USB drive:

Detailed Steps for Option 1: Using Microsoft’s Media Creation Tool
1. Download the Media Creation Tool
- Go to the official Windows 10 or Windows 11 download page.
- Click “Download tool now.”
2. Run the Tool
- After downloading, double-click the Media Creation Tool file to launch it.
- Accept the license agreement.
3. Select Your Purpose
- Choose “Create installation media for another PC” and click Next.
4. Choose Settings
- Select the preferred Language, Edition (e.g., Windows 10 Home/Pro), and Architecture (64-bit/32-bit).
(Tip: If unsure, use the “Use the recommended options for this PC” checkbox.)
5. Select USB Drive
- Insert your USB drive into the computer and ensure it’s detected.
- Select USB flash drive as the media to use and click Next.
6. Download and Create Bootable USB
- The tool will download Windows files and write them to your USB drive.
- Once completed, you’ll see a confirmation message.
7. Finalize
- Eject the USB drive safely by right-clicking its icon in File Explorer and selecting Eject.
Detailed Steps for Option 2: Using Rufus
1. Download Rufus
- Visit Rufus Official Website and download the latest version.
2. Prepare USB Drive
- Insert your USB drive into your computer.
- Ensure it has at least 8 GB of space and is empty (Rufus will erase all data).
3. Configure Rufus
- Open Rufus and locate your USB drive in the Device dropdown.
- Under Boot selection, click SELECT and choose your downloaded Windows ISO file.
4. Adjust Partition Scheme
- Set the Partition scheme based on your system:
- GPT for UEFI (modern systems).
- MBR for legacy BIOS (older systems).
5. Start the Process
- Click START, and Rufus will prompt you for confirmation.
- Select your preferred Windows installation mode (Standard or with custom files).
6. Monitor Progress
- Rufus will format the USB drive, copy Windows files, and create the bootable media.
- Wait for the process to finish; it can take 10-20 minutes.
7. Eject the Drive
- Once completed, eject the USB drive safely.

Troubleshooting Common Issues
1. USB Drive Not Detected
- Ensure your USB drive is properly inserted.
- Try plugging it into a different USB port.
- Use Disk Management to check if the drive is recognized (press
Win + X→ Disk Management).
2. Rufus Errors
- Ensure the ISO file is not corrupted by re-downloading it.
- Run Rufus as Administrator.
- Check the log in Rufus for detailed error messages.
3. Cannot Boot from USB
- Access the BIOS/UEFI settings and ensure USB boot is enabled.
- Adjust the boot order to prioritize the USB drive.
- Ensure the USB drive is fully formatted and bootable.
4. Slow Creation Process
- Use a USB 3.0 drive and port for faster data transfer.
- Close background applications during the creation process.
Using the Bootable USB for Installation
- Boot from USB
- Restart the target computer and enter the boot menu by pressing the specific key (e.g., F2, F12, Esc, Del) during startup.
- Select Installation Options
- Choose the language, time, and keyboard preferences, then click Next.
- Install Windows
- Select Install Now and follow the on-screen instructions.
- Enter your product key or skip it to activate later.
- Partition the Drive
- Choose the partition where Windows will be installed. Format it if necessary.
- Complete Installation
- Wait for the installation to finish. The system will restart several times during the process.
Would you like more help with troubleshooting or advanced configuration options?
9Best Free AI Tools
- Best investment apps 2025Here’s a detailed list of the Best Investment Apps, based on ease of use, returns, features, and user reviews, suitable for both beginners and serious investors.… Read more: Best investment apps 2025
- Make Money online high-paying survey websitesMake Money online with high-paying online survey websites that are trusted, legit, and offer better payouts than typical platforms. These can be great for earning extra… Read more: Make Money online high-paying survey websites
- Best 9 Ways to Fix Slow Internet Speed on Windows 11why my internet speed so slow Windows 11 Full Guide: 9 Ways to Fix Slow Internet Speed on Windows 11 (Step-by-Step) how to increase traffic in… Read more: Best 9 Ways to Fix Slow Internet Speed on Windows 11
- Best 8 way fix slow upload speed on both mobile and PC/laptopSure! Here’s a complete English guide on how to fix slow upload speed on both mobile and PC/laptop, written clearly and without using icons: Full Guide:… Read more: Best 8 way fix slow upload speed on both mobile and PC/laptop
- How to redirect posts WordPressTo redirect posts WordPress, you can use different methods, including plugins or manual code changes. Here’s how you can do it: 1. Using the “Redirection” Plugin… Read more: How to redirect posts WordPress
- (no title)By Baljeet Yadav
- Top Summer Nails Ideas 2025Here’s a complete guide on “Summer Nails Ideas 2025” with trends, colour tips, designs, and nail care suggestions to keep your nails fresh, trendy, and healthy… Read more: Top Summer Nails Ideas 2025
- How to Download Songs from YouTubeDownloading songs from YouTube without proper authorization from the content creators or copyright holders is typically against YouTube’s terms of service and may also violate copyright… Read more: How to Download Songs from YouTube
- improve seo on website | How can I improve my SEO strategy for my website?Here are some key areas to consider for improve seo on website strategy: Content Optimization: Earn Money with ClickBank | 100 $ per day Technical SEO:… Read more: improve seo on website | How can I improve my SEO strategy for my website?
- What is Somatic Yoga | Is Yoga a Sin | Is Yoga DemonicHere’s a full, detailed explanation What is Somatic Yoga of the following topics with a comparative table: 1. What is Somatic Yoga? Somatic Yoga combines traditional… Read more: What is Somatic Yoga | Is Yoga a Sin | Is Yoga Demonic
- 9 best blogging platform to make money9 Best Blogging Platforms to Make Money Introduction 9 Best Blogging Platforms to Make Money – Blogging has become one of the most effective ways to… Read more: 9 best blogging platform to make money
- how to create backlink with rankmath seo automaticcreate backlink automatically using Rank Math SEO directly is not a built-in feature of the plugin. Rank Math is primarily an SEO optimization tool designed to… Read more: how to create backlink with rankmath seo automatic
- What is a Backlink CheckerWhat is a Backlink Checker , Backlink checkers are your SEO secret weapon. These tools shed light on your website’s backlink profile, revealing: Benefits of Backlink… Read more: What is a Backlink Checker
- What are the best 10 tools for improving SEO on websites?Discover the top 10 tools to supercharge your website’s SEO performance. Elevate your online presence today 10 Essential SEO Tools: Boost Your Website Now Here are… Read more: What are the best 10 tools for improving SEO on websites?
- bing api pricing | google search console apiWhen integrating search functionalities into applications, understanding the pricing and capabilities of available APIs is crucial.Here’s an overview of the Bing API pricing and the Google… Read more: bing api pricing | google search console api
- 10 Tips Easy open google adsense account | Please open my adsense accountopen google adsense account is straightforward. Follow these steps to get started: Additional Tips for Google AdSense Success , 10 Tips open google adsense account open… Read more: 10 Tips Easy open google adsense account | Please open my adsense account
- what is bing | what does bing bong mean | what does bing chilling meanWhat Does ‘Bing Bong’, ‘Bing Chilling’, and ‘Bing’ Mean? – A Full Guide In the era of memes, viral videos, and pop culture phenomena, certain phrases… Read more: what is bing | what does bing bong mean | what does bing chilling mean
- Top 10 Most Popular Ways to Earn Money OnlineHow To Make Money Online 2023 If you want to earn money online sitting at your home, then you can easily earn money, I have given… Read more: Top 10 Most Popular Ways to Earn Money Online
- How to Find the Perfect Youtube Thumbnail Maker Appbest thumbnail maker app for youtube best thumbnail maker app How to Find the Perfect Youtube Thumbnail Maker App . Looking for an easy way to… Read more: How to Find the Perfect Youtube Thumbnail Maker App
- which reports indicate how traffic arrived at a website?Sure, website traffic reports are crucial for understanding how people find your website. Among the various reports available, some key ones specifically indicate how traffic arrives… Read more: which reports indicate how traffic arrived at a website?

